Kitchen Part 2.5 - How Sourcing a Subzero Refrigerator Nearly Killed Our Kitchen Renovation

[NOTE: If you are hell-bent on buying an old Subzero as well, please read the section at the bottom on what to look out for so you don't get completely screwed! Despite any implied vitriol below, they're fairly simple appliances and largely easy to repair with simple hand tools. We might extrapolate on repairs & modifications in the future with a separate post, if there's any interest.]
To preface, we are no strangers to making our lives harder by being stubborn as hell. Sometimes for good reason, other times because we simply cannot let go. We must also apologize in advance for this being word-heavy and photo-light—documentation was not the priority for the duration of this debacle.
At the start of our kitchen renovation we had planned to use as many preowned appliances as possible, but due to time, aesthetic considerations, and storage constraints, that plan quickly fell apart. The only appliances we ended up either reusing or purchasing used were our microwave, and the ill-fated Subzero.
We must impress that while we are aware of the sunk cost fallacy, again, we are very stubborn people—there is no way purchasing a heavily depreciated luxury appliance from 25 years ago will ever make much sense, financially or at all. To anyone who knows us more personally, there are a lot of parallels to be drawn between the fridge, and a certain 1989 SAAB 900 Turbo found in our driveway.
The first brush with built-in fridges came in fairly early in the planning process, but the idea of a Subzero in particular was sparked thanks to a very run down custom paneled 550, built in 1989, that showed up at the Albany Habitat for Humanity ReStore in December of 2023.
While we were not fans of paneling our fridge, seeing a countertop depth fridge in person made the sale, in a sense, as most appliance manufacturers have long ago abandoned that concept. So before long, we were trawling FB Marketplace and Craigslist to find a stainless steel Subzero 550 or 650, but quickly ran into a problem.
See, it makes sense in retrospect, but an appliance like this is an investment. They're expensive objects that live and die with the kitchens they are built into, and so tend to have very long lives, with anyone replacing them before they're truly used up probably having a lot of cash to spare... e.g. the sort of people that live in fancy gated communities, in places like the Atlantic coast of Connecticut. The ones up for sale were also largely custom paneled to hide them neatly within the cabinetry that surrounded them, as hiding your appliances in a wall of cabinetry was the luxury kitchen trend that emerged in the post-modern era, making the stainless versions rare and pricey in comparison.
Did we mention these behemoth appliances weigh north of 600lbs yet? Turns out this is an important detail—they're not easy (or cheap) to move.
Blind Bargaining
When you're up against time constraints and budget constraints, sometimes decisions get made in the moment that you later come to regret. (Ok maybe not exactly regret, but, hindsight and all that...)
The dimensions and heft of these fridges (see: behemoth) do not make it easy to just find a friend with a truck and go pick one up. Welcome to everyone's favorite project planning word: Logistics. Stressing the fact something like this is LARGE and HEAVY, we also had to cope with the nearest one within our budget being 3 hours away.
Going off of 4 poorly shot photos posted to Facebook Marketplace, we bargained with the seller to lower the price to a mere $800. Sounds like a steal for a fancy fridge, right?
Wrong.
We then had to pay a moving company to pick the fridge up from CT, drive it to our house, bring it in, and place it in it's temporary location (which happened to be our dining room-turned-temporary kitchen, since our kitchen at that point was stripped down to nothing). This cost us an additional $1650, and a broken front foyer lamp shade.
Fridge Cost Checkpoint: $2450
So now we have the fridge, and the moving company reimbursed us for the broken shade (that we miraculously found a replacement for), so everything's coming up Milhouse, right?
Wrong again.
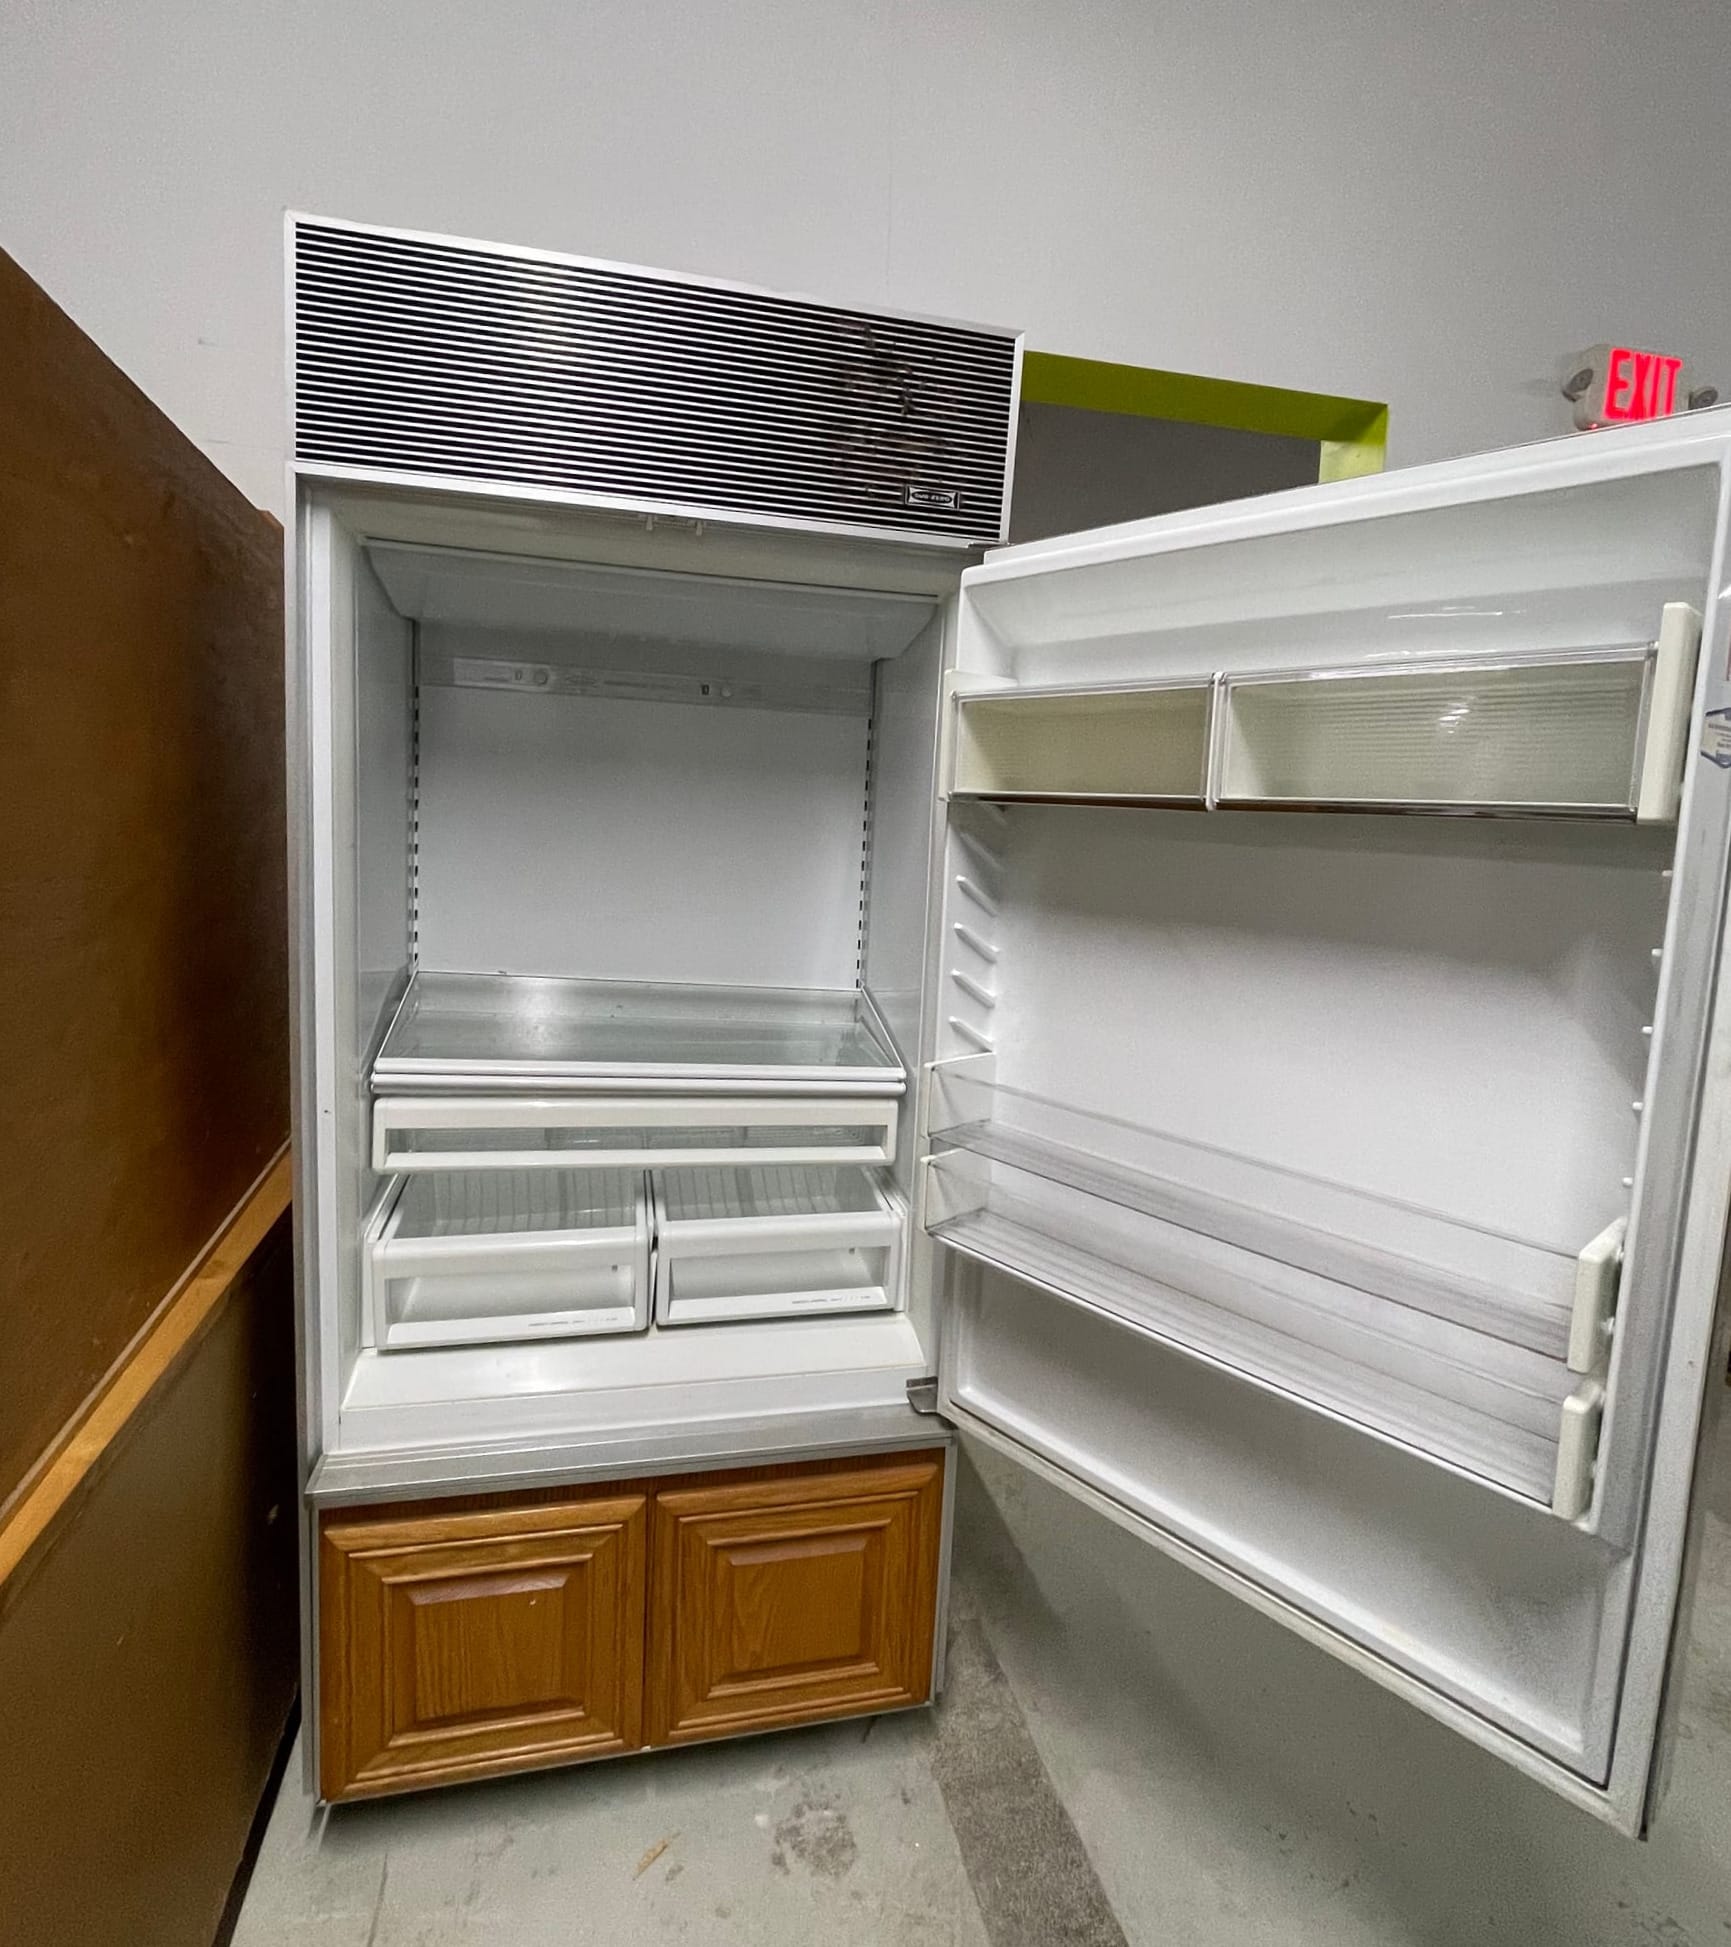
Part of the blind bargaining process was seeing what may have been a bit of rust in a photo, but not knowing the extent of it. Well...
We had a lot of work ahead of us. Remember that project car parallel? Yeah.
At least we had the tools and experience in this area!
Surprise! It's Fucked.
Word to the wise, if you unplug your fridge and shove it into your basement garage, please open the doors after you take photos for posting it up for sale; it might be several months before someone dumb enough to buy it comes along, and all the condensed moisture is going to turn it into a mold palace.
We spent the better part of two months doing the bulk of restoring the fridge, and by restoring it we mean making everything permanently smell like Pink Stuff—whoever on the internet recommended this cleaning product can go kick rocks because, ew, we much prefer the scent of sassafras.
Unfortunately, we learned the hard way that the issues were more than just cosmetic.
Fridge Cost Checkpoint: $2700 + a lot of physical labor.
At this point in the story, our old fridge had to be removed from the kitchen in order to complete demo and start work on the floor. We sold the old fridge that night since there was nowhere to store it, leaving us with the Subzero as our only option for refrigeration. So we plugged it in, made sure it got cold, and moved our food over.
Did you know, fridges are only useful if they stay cold?
Yeah, it only made it a day or two before the evaporator froze up, and cleaning the obscene amount of dust off of the condenser barely made any improvement. We quickly ended up with our food crammed into a chest freezer, a tiny dorm fridge, and several coolers—oops!
The Snowball Effect
The mechanical and electrical problems/unfortunate discoveries came one after another from this point, so we'll unfortunately have to condense it into a list:
- Almost every bulb was burnt out (and one of the two freezer lamp sockets was hopelessly corroded)
- Fridge and freezer door seals were all collapsed and leaking (keep this in mind for later)
- Fridge thermostat failed (pilot tube pinched by the evaporator icing up)
- Fridge compressor start relay melted out
- Freezer condensate drain froze up (known issue, installed drain heater mod P/N 4202160)
- Fridge compressor service port schrader valve leaked; had to be replaced and the fridge recharged with refrigerant.
- Fridge condensate drain disintegrated and started leaking water all over the floor
- Both front leveling feet had been cut off (still haven't figured that one out)
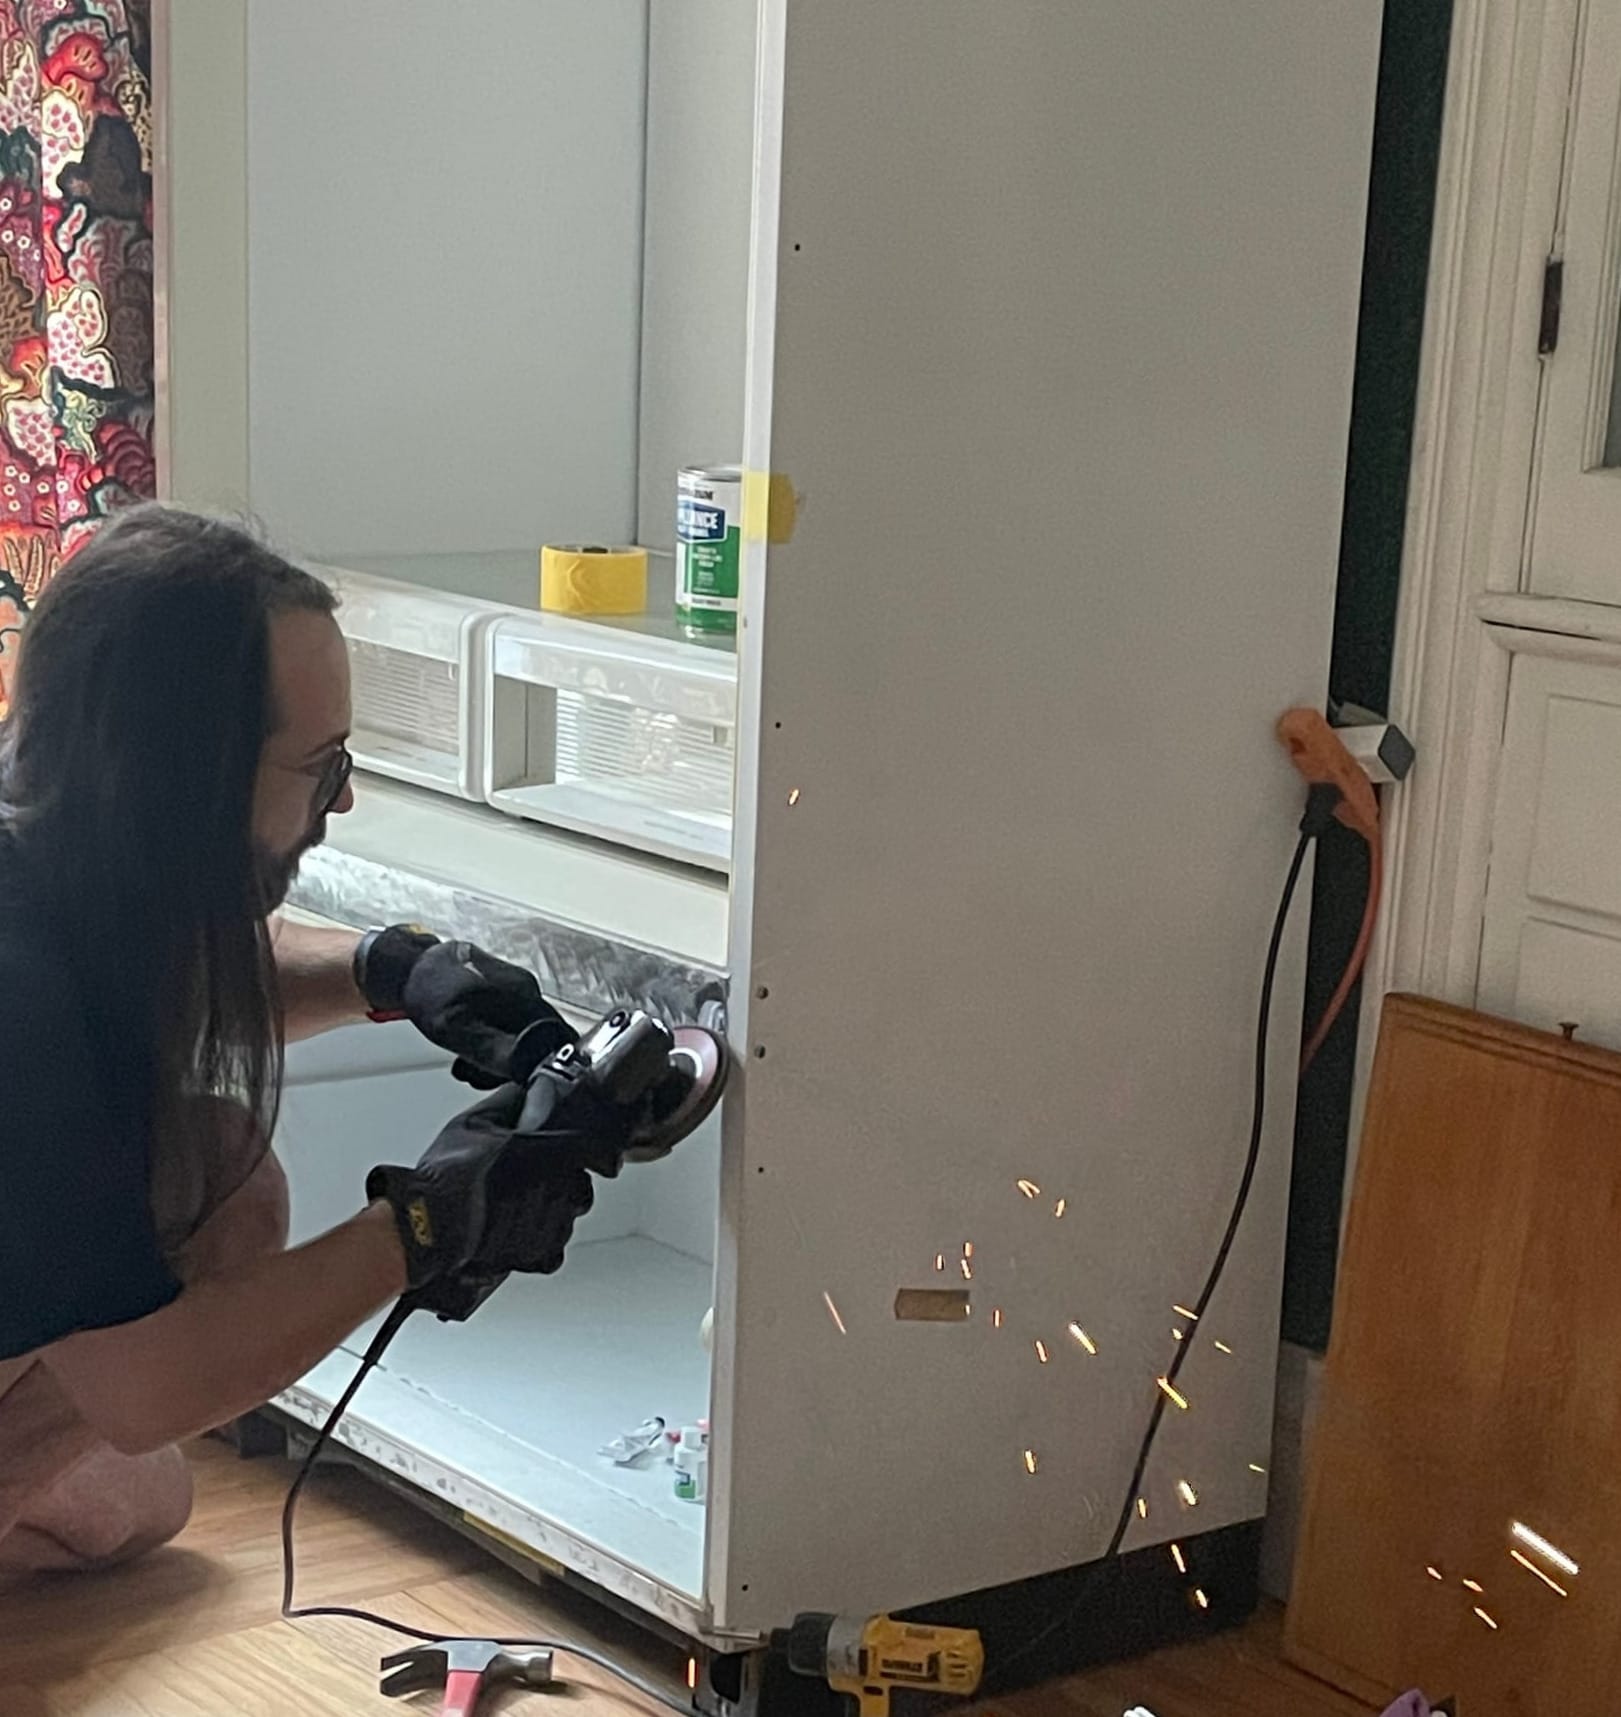
And that's just mechanical and electrical issues; as hinted above, we also had to do a lot of painting (remember the rust?) on the main frame, the shelves, freezer racks...
But the biggest issue? All the foam insulation in the fridge, particularly above the freezer, was absolutely saturated with water. Turns out, water is not a very good thermal insulator.
Fridge Cost Checkpoint: $3650 + more than a few mental breakdowns.
The saturated insulation turned out to be the biggest reason why the fridge was freezing up—cold air from the freezer was coupling to the fridge floor, freezing up the condensate drain, then up the resulting ice block, eventually freezing up the evaporator coil. Subzero knew about this happening, and it was evidently a design flaw exacerbated by bad door seals or improper fridge storage (mainly leaving the doors closed while defrosting), with the condensation wicking into the foam through gaps in cracked sealant around the bottom of the fridge compartment.
Over time, the duration between evaporator dethawings grew longer, but the final solution was partly the Subzero modification for this (P/N 4202530), a costly modification which mostly comprises of a large heater pad glued to the fridge floor, but the biggest benefit came from one of these $20 things. Water can't condense and freeze if it's not in the air!

We did also re-caulk the bottom of the fridge and the condensate drip tray as well while the fridge was apart for cleaning and painting, and are pleased to report the fridge hasn't frozen up once since September of 2024.
One last hurdle...
So we mitigated a lot of the issues. Our food was no longer at risk of spoiling, we figured out how to keep it behaving, and devised a method to monitor the temperature for any concerning fluctuations. Great.
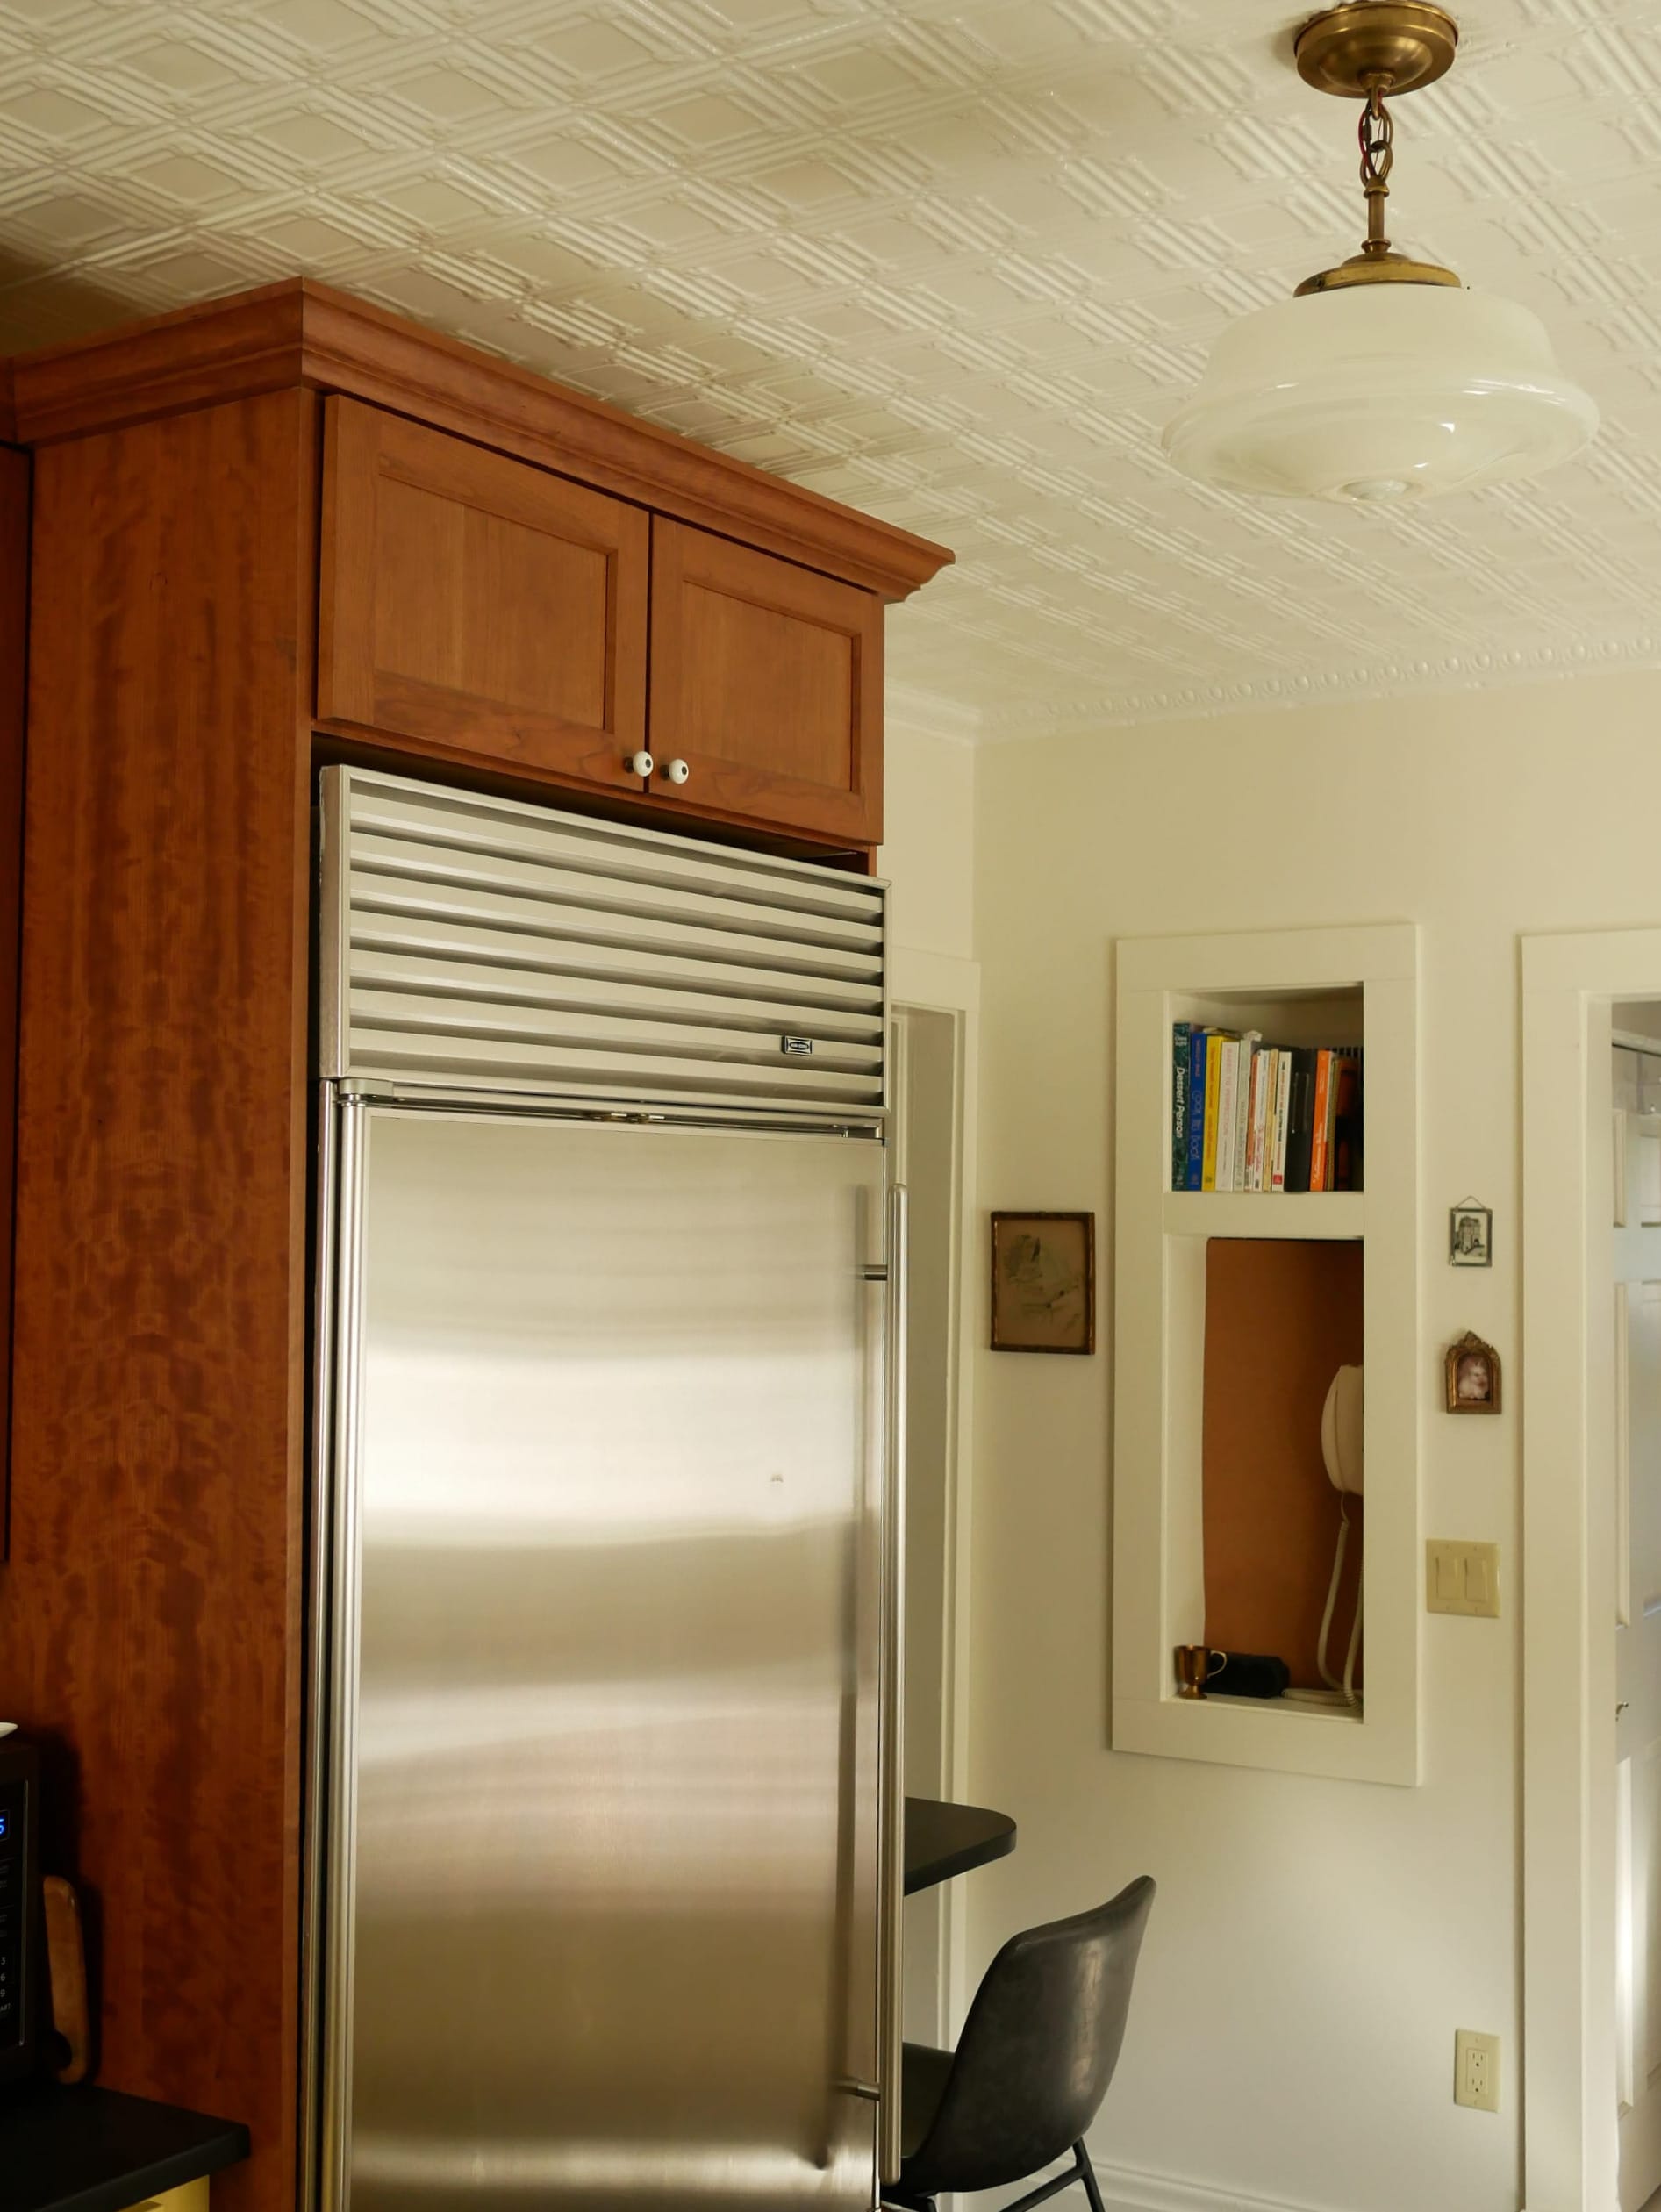
But...it was still sitting in our temporary kitchen. At this point in the story, the cabinetry was in, countertops were installed, floor was finished, backsplash done, and all other appliances in place. The Behemoth needed to move.
So we hired another moving company. To move a fridge 20 feet from one room to the other. 4 guys, a few doohickeys, a lot of yelling, and $800(!) later...
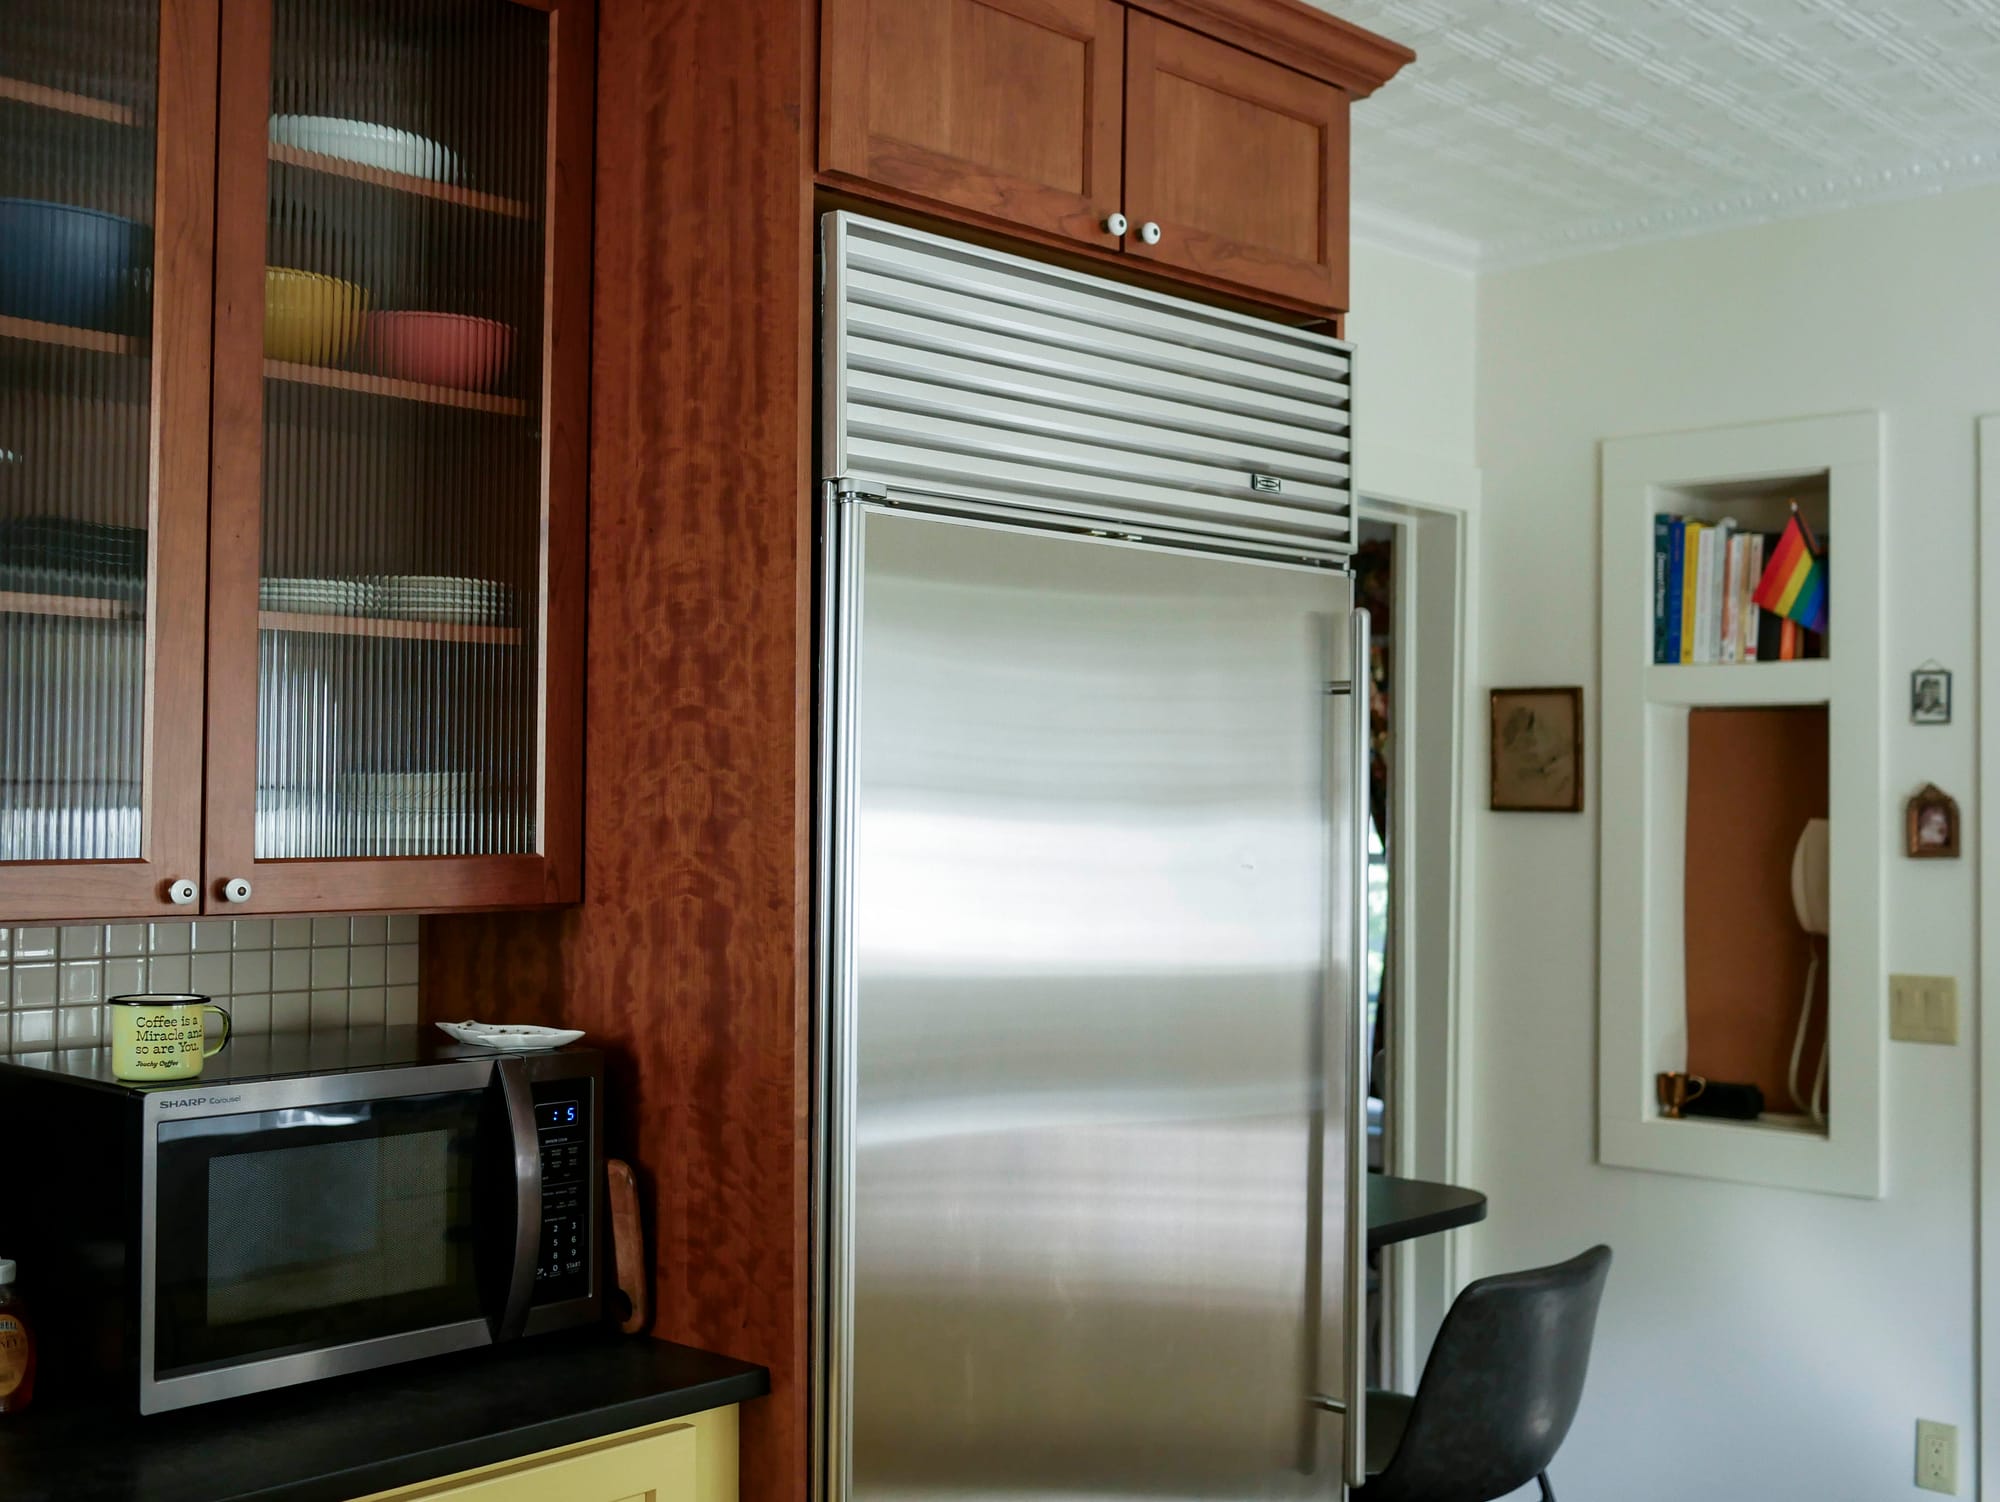
There she sits. Ain't she a beaut?
Final "Salvaged, Budget-Friendly, 28 Year Old Fridge" Cost:
$4,750
Do We Recommend This?
The fridge? Absolutely! These things are tanks, fairly efficient despite their age, and are closer to commercial appliances in terms of ease of maintenance. Our $4,750 final tally comes within spitting distance of a professionally restored model, which would have have made this significantly less mentally taxing... but where's the fun in that?
That said, if you do not want to spend $10,000 on a new countertop-depth fridge that requires an app to adjust the thermostat, but are not the gluttons for punishment that we are, the aforementioned professionally restored models (some of which can be shipped all across the country!) are available. We can't vouch for any of those companies, however, so your mileage, etc., etc.
As promised—if you're looking to get a good deal on a used one, here's a brief list of things to look for in a used Subzero 500/600 series:
- Rust! It's not a world-ender (the frames are galvanized), and any old wrinkle white appliance epoxy paint will work, but paint touchup gets tedious real quick.
- If it's been unplugged, make sure it had been left open while defrosting or you'll be in for a similar world of hurt as we were. It's fixable, but don't rely on it as your only fridge until proven safe.
- Along those lines, check for collapsed door seals and cracked sealant around the bottom of the fridge (under the crisper drawers). Both are easily and cheaply fixed, but again, don't rely on it as your only fridge.
- If it's a 500 series, make sure it's post-1993 production or has been converted to R134a refrigerant—the older R12 fridges cool better, but good luck getting it serviced as legal R12 refrigerant production ended a decade and a half ago. The refrigerant type should be on the information sticker on the inside of the door frame.
- If any of the shelves are broken, be aware they are only available used, and that used ones are very pricey.
- The 600 series has nicer to use digital controls, but replacement parts are much more expensive and less reliable than the analog thermostats and timers on the 500s.
If you made it this far, we thank you for reading this screed! The next post will be Demo & DIY, which will hopefully come across your feed by the end of April.